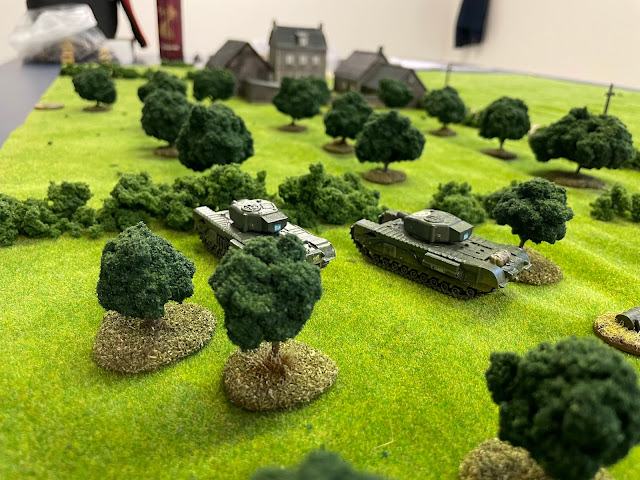
After successfully taking the "Hauptkampflinie", the British push on towards St Nicholas Farm. The time table is tight but there is still hope to snatch something resembling victory from the jaws of defeat. The problem is that the Germans are guarding those jaws with MG42:s and panzerfausts...
The AVREs "Hannibal" and "Hasdrubal" approach St Nicholas' Farm.
Bavarian beer and "Riesen" sweets in the distance...
Both sides have fresh platoons. The Germans switch automatically when pushed back from the Hauptkampflinie, the British voluntarily since the first platoon had taken such horrendous casualties and morale was very low.
This is the eighth battle of our Operation Martlet campaign. The mission is Attack and Defend. The British win if they can force the Germans to withdraw while keeping the British Force Morale at 3 or higher.
The view from the other side of the hill...
From III Battalion’s headquarters at St Nicholas farm, the platoons senior NCO oberscharführer Knaust saw the decimated ragtag platoon led by Frey and Wegner as they came running from the direction of the smoking inferno that used to be Fontenay.
Exhausted and out of breath, Wegner reported that Raus and the platoons leader Obersturmführer Weiss were missing. They had last been seen charging into hand-to-hand combat.
Obersturmbanführer Dr Otto Hahn
Frantic activity to restore order and set up a new defensive line was all ready going on all around. Frey and Wegner were ordered to report to their new platoon officer, a 29 year old former engineer named Dr Otto Hahn. He awaited them at their new position just outside the farm together with some fresh reinforcements to fill out the ranks and a new NCO named Hinze to take over the remains of Raus' group.
Dr Hahn seemed confident as he watched the men refill ammunition and grenades, but as the sound of tank tracks from the direction of Fontenay grew stronger and stronger Frey and Wegner feared that they had just experienced the beginning of a very long day…
Aerial view of the battlefield. The Germans defenders start on the right side of the map, the British attackers enter from the left.
Forces
British platoon
 |
Lt Featherstone & Platoon Sergeant Yates |
The British platoon starts at full strength, i.e.
- Lt Featherstone
- Plt Sgt Yates
- Lt Mortar, 2 men
- Piat, 2 men
- Section 1, Cpl Barker, 3 man Bren team, 6 man rifle team
- Section 2, Cpl Grant, 3 man Bren team, 6 man rifle team
- Section 3 , Cpl Bath, 3 man Bren team, 6 man rifle team
Opinion
- CO's opinion: 0. (the Lt's father served with the CO)
- Own opinion: Content.
- Men's opinion: -5. (-1 Force Morale roll)
British support (20)
- AVRE (7)
- AVRE (7)
- Mortar observer (4)
- Adjutant (1)
- Medic (1)
German platoon
Opinion
- CO's opinion: +3. (+1 Force Support)
- Own opinion: Droll.
- Men's opinion: Changed to +5. (+1 Force Morale)
German support (11)
- Mortar observer (4)
- Senior leader (2)
- Entrenchment (4)
- Extra panzerfaust (1)
Patrol Phase & Jump Off Points
The German patrols start around the farm, the British enter on the road and the orchard.
German patrols to the left and British to the right (two patrol markers in each stack for the British).
The British start the patrol phase with 6 free moves - a good start!
Final positions of the patrols. Germans are tan, British are green.

Placement of Jump Off Points. Both sides have placed them mutually supporting.
The Battle
The British start at Force Morale 8, the Germans at 11.
Early game
Both sides start the game very cautiously.
The AVRE "Hannibal" is first to arrive in the battlefield.

Hannibals sister-tank Hasdrubal arrives, and both move forward cautiously to the front jump off point to join up with the forward infantry recon elements. Hannibal takes an overwatch position by the hedge, Hasdrubal lagging a bit behind.
The scout team (detached from Cpl Barkers section) prepares to advance towards the forward German positions. Advancing under the overwatch umbrella of two AVREs should be enough, right?
The scouts are very close to closing down the forward Jump Off Point. However, if they move within 4" so as to make it temporarily unusable, whey will be within 6" of the edge of the orchard and be vulnerable to fire from the hedge in the distance. A better alternative would be to move onto it to lock it down permanently, but the German player has a bunch of CoC dice and could easily place an ambush just outside of the orchard to stop them outright, out of sight of the AVREs overwatch.
So close...
The decision is made to have the AVREs cross the hedge. The risk of getting permanently stuck isn't that great and the alternative is a rather long-ish detour via a tank-sized gap in the hedge.
Hannibal is ok, but Hasdrubal, always the laggard, gets stuck.
This is when the Germans, after much deliberation, decide to strike. They play a CoC dice to end the turn, removing the Overwatch and Tactical status of the British.
Mid game
Obersturmführer Dr Hahn together with Unterscharführer Frey and his squad appear, entrenched and within 4" of the scout team. The result is an instant close combat. The Germans have more than 4x the number of dice, so the British rout of the map immediately.
Time to bugger of and let the AVREs handle this!
The British player uses a CoC dice to fire the AVRE before the panzerfausts start flying. Hannibal wont die with a loaded gun, that's for sure. Not that the risk is that huge, being hit on a 7+ due to the concealment in the orchard and having 8 armour dice vs the fausts 11 attack dice.
BOOM! But just one man down?
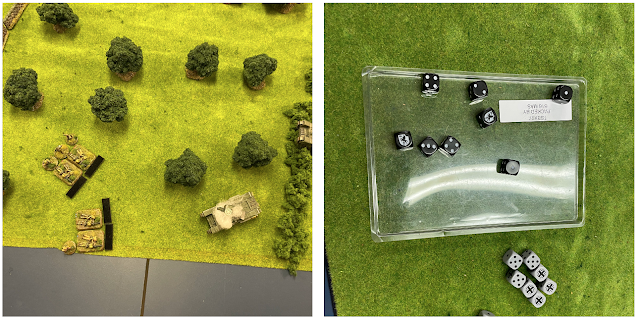
Hinze's squad appears and fires two panzerfausts. Both hit. Time to roll damage dice for the first one.
Seven of the eleven strike dice of the panzerfaust end up 5+... It's curtains for Hannibal. The crew manage to bail out, fortunately.
The commander of the Hasdrubal takes stock of the situation and prioritizes fire over movement and orders the gunner to shoot at the entrenched Germans. His shell strikes home, killing Scharführer Hinze and wounding one of the rank and file in his squad. The Hasdrubal is worryingly exposed.
BOOM! Scharführer Hinze is killed!
The British react to the Germans having showed their positions. The Hasdrubal successfully backs off the hedge (not without a sigh of relief...) and Grant's section together with Plt Sgt Yates arrive taking positions on the hedge together with a forward observer. The British fire suppressive fire and throw smoke, fully aware that one British section is no match for two German squads in a firefight.

The AVRE is now a 9+ to hit, so the Germans counter byFrey's squad running up to the hedge to flank the British (they still have 2 panzerfausts) while Wegner's squad occupy their trenches.
Even with the covering fire and smoke the Germans manage to get some effective fire in. The British take some casualties and Cpl Grant is temporarily KO:ed.
The orchard is full of Germans!
However, the British react to the attempted flanking move. Lt Featherstone arrives with Cpl Bath's section and open fire together with the Hasdrubal which has reloaded another shell. The Germans take some casualties and are pinned.
Flank this, Jerry!
Obersturmführer Hahn decides to abandon the squad to its fate, and runs back to the trenches to take command of the two squads that remain in good order.
Some further fire on the flanking German squad finally breaks it, causing it to run off the map.
Seems like the British have this well in hand, right? Right....?
Late game
Granatenwerfers sofort, bitte! Vielen dank, das war schnell.
The Germans again end the turn, removing the British ranged in marker. They then deploy their own observer. Cpl Grant by the hedge realises that his section will get the full fire power of two German panzergrenadier squads and uses a CoC dice to fall back. Unfortunately the British observer gets left behind and gets gunned down...
The British realise that they can't have 2 sections and 2 senior leaders standing in an orchard being bombarded by mortars, especially since they have no way of ending the turn (should have been more frugal with those COC dice...). The troops start falling back, but not far enough.
With mortar shells falling the British are pinned. The AVRE commander panics. The Germans move up to the hedge and open fire on the British rifle team that is outside of the bombardment.
The German panzergrenadiers charge forward to the hedge and take firing positions while the mortar shells start falling. The British don't take *that* bad casualties but the situation is untenable, especially as the commander of the Hasdrubal panics and can't even activate next phase.
Maschinengewehr!
Dr Hahn directs his troops to lay down a deadly fire on the exposed British.
British withdrawal
The British decide to cut their losses and withdraw with a Force Morale at 6, the Germans being at 9.
Post Battle
Since the Germans have won they are allowed a counterattack next battle. This will not only delay the British further but actually has a chance of succeeding since the British are so badly battered.
British
The British post battle evaluation can be summed up in two words. Total disaster. Since everyone was pinned when the withdrawal was called, a large portion where either captured or dispersed.
The only "comfort" is that no officers or NCOs where taken POW, even though many where scattered.
Losses
- KIA - 3 men permanently removed due to death/injuries
- POW - 4 men permanently removed as prisoners of war
- WIA - 2 men miss next battle while recuperating from injuries
- Scattered - Lt Featherstone, Plt Sgt Yates, Cpl Bath and 6 men are scattered and miss next battle,
Opinion
- CO's opinion: Reduced from 0 to -1.
- Own opinion: Reduced from Content to Sad.
- Men's Opinion: Reduced from -5 to -7.
Lt Featherstone now has the nickname "Dangerous". He has a reduced command range of 6", and the force has a -2 to the Force Morale roll.
German
The German objectives for the game where 1) keep the Panzer IV alive for the next battle (since it is fought on a basically open plain), 2) avoid major losses and 3) win if possible. One might call the outcome a success...
Losses
The only negative is that Scharführer Erwin Hinze was KIA.
One man misses the next fight while recovering from wounds.
Opinion
- CO's opinion: Improved from +3 to +4
- Own opinion: Improved from Droll to Merry
- Men's opinion: Reduced from +5 to +4. Hinze was apparently popular.


Comments
Post a Comment