3rd Probe into Fontenay, June 25th, 12:00

The mid day sun shines on an orchard in Normandy. Will the British be successful in their 3rd attempt at bypassing the German position?
This is the third battle in our Operation Martlet campaign, and also the third time the British attempt to probe the German lines at Fontenay. The British have failed in the previous two attempts, will they be successful the third time around?
The British plan
Third time's a charm, right? The morning mist has cleared while our artillery bombardment is as heavy as ever.
The AVRE will advance towards the entrenched positions and shell the Germans there. If the Panzer IV shows up again we will smoke it with the light mortar. This might tempt it forward into PIAT or AVRE range.
We will then deploy the infantry, engage or avoid enemy positions and get a team past the German lines.
Forces
British platoon
The British platoon looks as follows at the start of the battle:
- Lt Stuart
- Plt Sgt Scott
- Lt Mortar
- Piat
- Section 1, Cpl Wilson, full strength
- Section 2 , Cpl Brown, less 1 rifle
Opinion
- CO's Opinion: -3
- Own Opinion: Worried
- Men's Opinion: -2
British support (14)
- AVRE (7)
- Extra rifle section (4)
- Light Mortar (2)
- Adjutant (1)
German platoon
The German platoon starts at Full strength.
Opinion
- Commander's opinion: +2
- Own opinion: Assured (gives +1 on Force Morale roll)
- Men's opinion: +3
German Support (6 points)
- Pak40 (6)
Jump Off Points
These are unchanged since the previous battle.

Same old Jump Off Points, same old flanking German entrenchments...
The Battle
The British start the battle with Force Morale 8, the Germans with Force Morale 9.
Early game
The Germans, totally unworried about the British bombardment as usual, deploy in the trenches. Maybe they never left the bloody things? That would make sense actually.

You hardly have time to go for a cup of ersatz coffee before Tommy gets back...
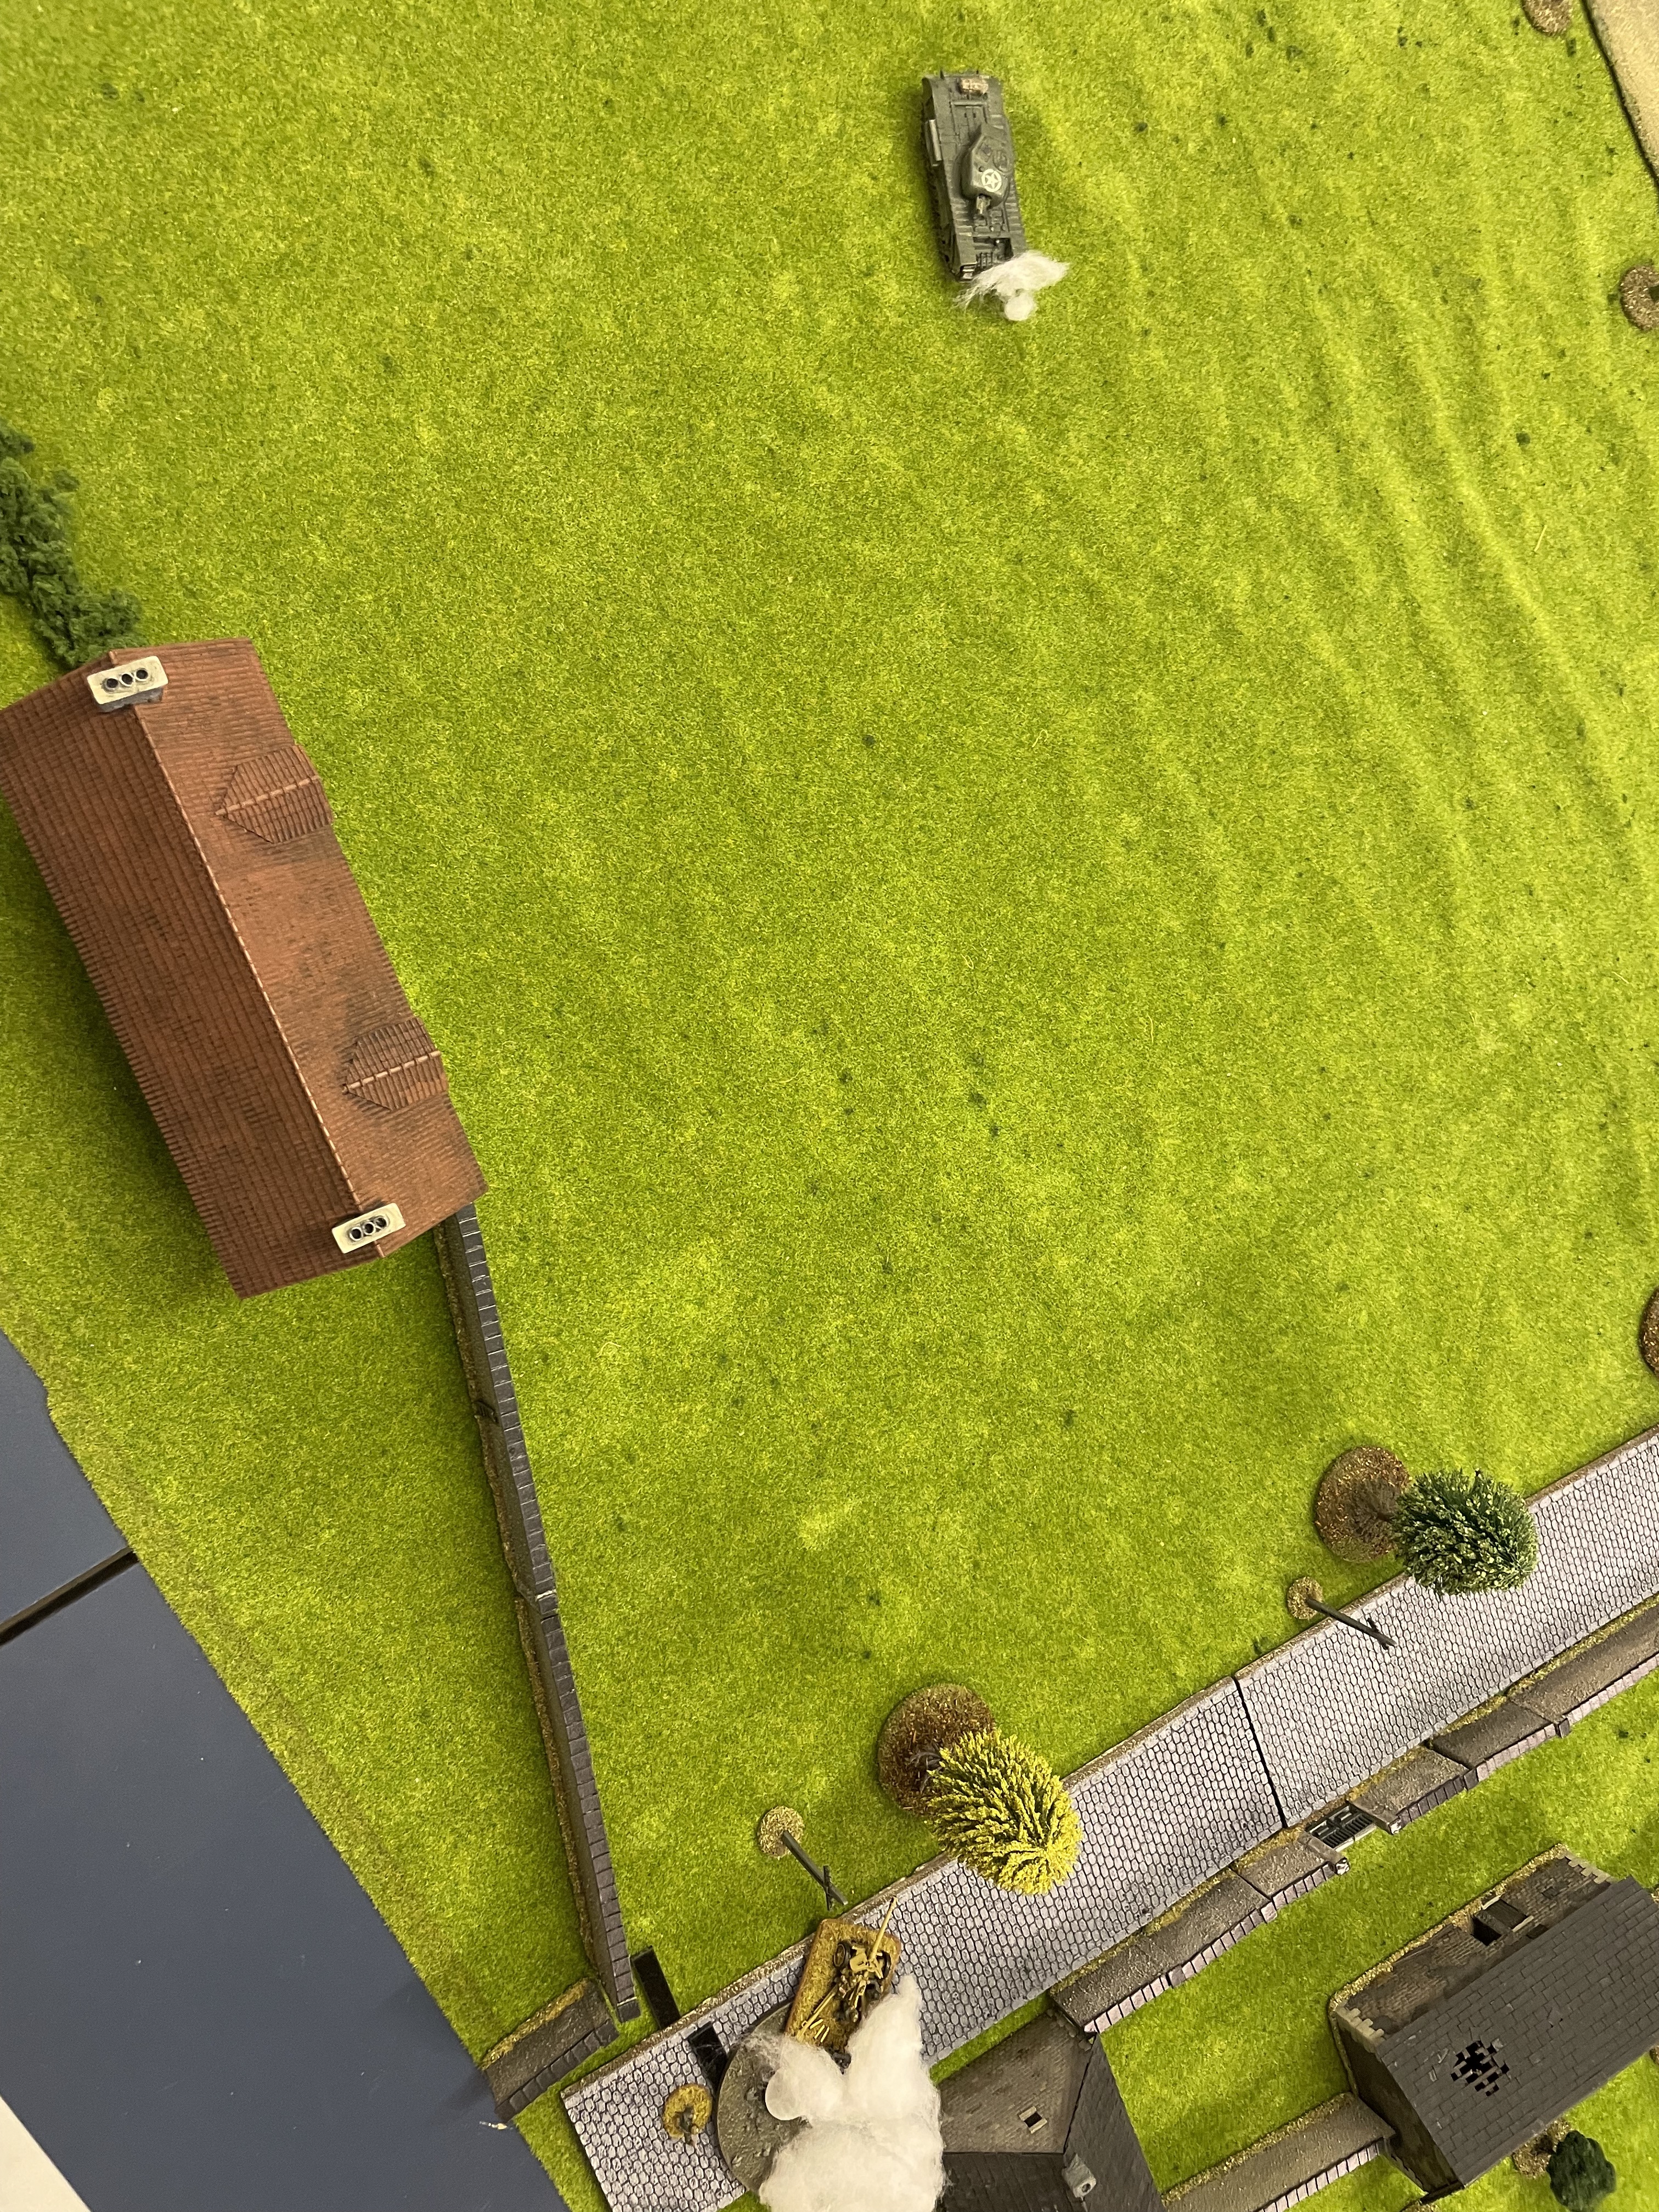
Anyway, without the mist-induced traffic-related confusion, the AVRE actually arrives on schedule, rolling up towards the German position and opens fire.

Take that, Jerry!
The Germans have an ace up their sleeve, however, and a PaK40 appears and opens fire! The thick hide of the AVRE easily deflects the shell, obviously "made in Paris". The AVRE fires back to good effect. Obersharfürer Weiss joins to direct the fire and keep spirits up. The German force has no adjutant, so this will make deploying further units difficult, requiring a 4+ roll.

An infantry squad, a PaK40 and Obersharfürer Weiss.

Boom!
To support the AVRE, the light mortar deploys and fires smoke. It scatters too far and has no effect. A rifle section accompanies it and opens fire.

The smoke lands too far.

Plt Sgt Scott and Cpl Wilson accompany the light mortar, and lay down effective fire despite the range and german entrenchments.
The PaK40 takes some losses and is eventually covered with smoke from the light mortar. Then the combined fire from AVRE and British infantry cause enough casualties to knock out the German infantry squad, leaving only the JL.

This time the smoke lands on target.
Obersharfürer Weiss and the infantry squad JL fall back behind the corner of the house to the right.
Mid game
The Panzer IV arrives in the AFV trench, adding its firepower vs the AVRE. The AVRE has taken 7 or 8 75mm shells by now, totally unaffected. Can such luck last?

Nicely camouflaged "trench".
The PaK40 pushes out of the smoke to engage the AVRE, something of a gamble... Which pays off when a shell knocks the AVRE out, forcing the crew to bail!
It's a hit! And a good one.

The AVRE crew have had enough, bailing out after 8 or 9 hits from 75mm AT guns.
More British infantry arrive, showering the PaK40 with rifle and Bren gun fire, pinning it. A third British section arrives, also firing at the PaK40, killing the crew. The JL runs off around the corner to join the other leaders hiding out in the orchard.

Cpl Brown's section deploys forward, firing at the PaK.

Too much incoming fire, all men down, only the leader left standing.

Clp Brown's section again.

Cpl Wilson's section close to the house, the extra section below and the light mortar in between. Both Lt Stuart and Plt Sgt Scott close by.
Mid game, part 2
The Germans deploy a blocking infantry section to back up the Panzer IV in order to prevent a British advance.

German rear guard takes position.

Closeup of the rear guard. Tactical since they deployed on a 2.
The British start to advance under the cover of smoke.

Clp Brown's men advance at a run.

The extra section runs up to the house. Will they enter the house and get into a firefight with the German rear guard squad?

The Panzer IV punishes Clp Brown's section.
The British ponder whether to do a frontal assault or a flanking right hook and choose the latter. The plan is to cross the hedge and move through the orchard.

The riflemen run while the light mortars provide smoke. The PIAT lingers of table, hesitating.
Then the Lt Stuart spots an opportunity (having a CoC dice as backup). On the right flank the German JOP is protected only by some empty trenches and three leaders (one injured) hiding behind the house.... This could end the battle and seriously affect the campaign in one fell swoop.

The British keep moving.

Three lone leaders, hiding behind a barn...
The British run (ok, jog, apparently dignity is more important than speed according to the British dice) in a flanking move to the right. The two forward British sections, Lt Stuart and Pat Sgt Scott are within one average running move from the JOP and the leaders.
The German then rolls 6, 6, 2, 2, 2 on the command dice, and the risk is that they may manage to deploy the third squad in the trenches, having two phases to attempt it. The British can not risk this, so they use their CoC dice for an assault with the most forward section (Cpl Brown's). Both Lt Stuart and Plt Sgt Scott join in the assault to make sure it goes well. They get within 4" of both the JOP and the German leaders.

Somewhat fatigued the British charge home, blocking the JOP at the same time by being within 4".
The British have 14 dice to the Germans 15, but the Dice Gods don't care. They don't like it up 'em!
A vicious assault ensues. The Germans whiff while the British most certainly do not. The PaK40 leader is killed, the SL and JL is knocked out and the German Force Morale drops to 3.
Nothing could possibly go wrong now, right? Right....? RIGHT!?!?!!?
Snatching defeat from the jaws of Victory...
Victory is at hand! Or is it...? In a momentary lapse of tactical sense, the British occupy the German positions to take the German leaders prisoner. However this takes them more than 4" away from the German JOP, making it possible for the Germans to deploy from it once again!
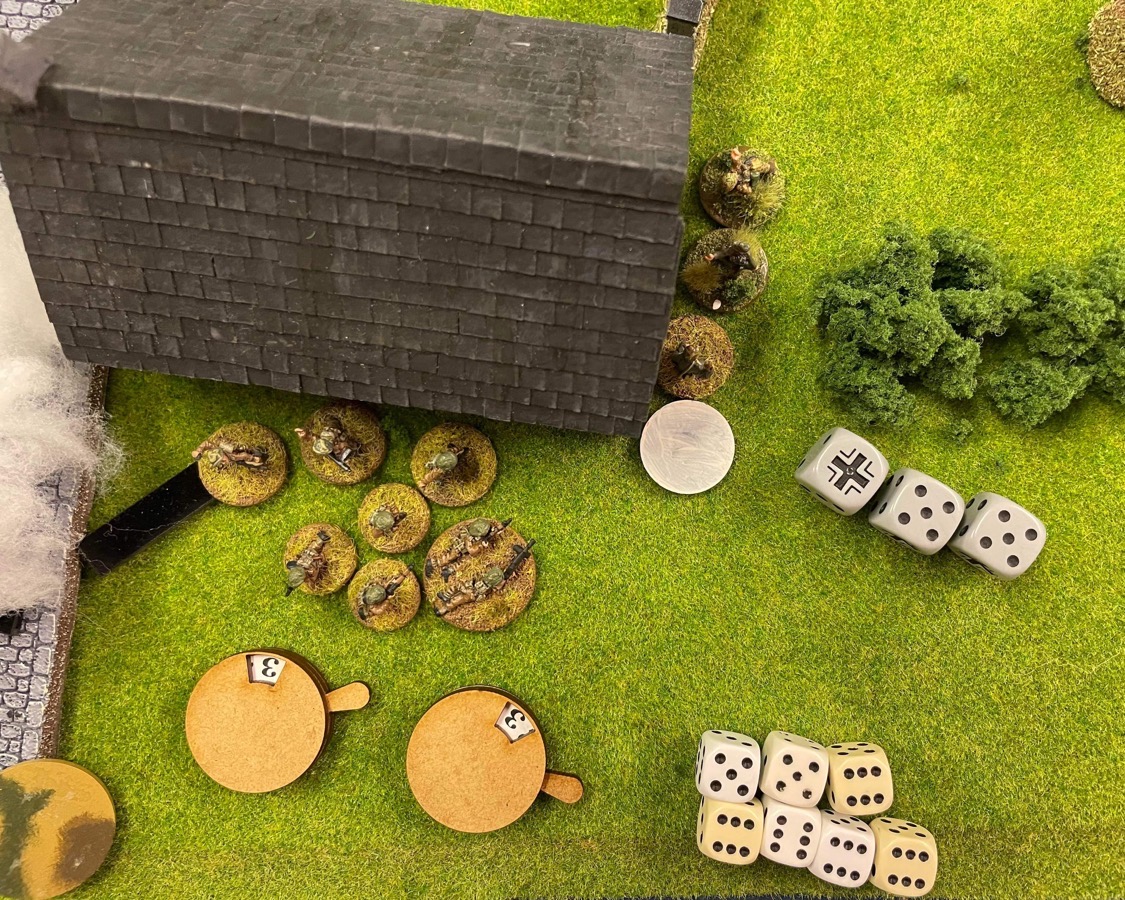
The Germans still have to pass the 4+ roll for having no Adjutant. This they do, opening up with devastating MG42 fire at close range, causing the British section to break and run into the orchard.

The third German squad is just outside of the picture in the upper right hand corner. The knocked out German leaders are visible there where they where abandoned by the routing British who now cover in the center of the orchard.
As a final spike in the coffin the German player then plays his second phase, gets enough CoC points for a CoC dice, ends the turn, routing Cpl Browns section with both Lt Stuart and Pat Sgt Scott attached. The British morale crashes to zero, ending the battle in a devastating defeat for the British.
British rout
The British rout with Force Morale 0, the Germans hold the field with Force Morale 3.
Post battle
British
A total of 7 casualties is split into 3 who never return, 2 who miss next game and 2 who return next game.
2 men are captured by the Germans and made POW.
Lt Stuart and Cpl Brown are dispersed while gathering stragglers. They and 4 men will not be able to participate in the next battle.
Pat Sgt Scott manages to return to the platoon without problem to no ones surprise.
Summary:
- 3 KIA for a total of 8 KIA
- 2 WIA and 4 dispersed, missing next turn
- 2 POW for a total of 6 POW
- Lt Stuart and Cpl Brown dispersed, missing next turn
In other words, next time the British will have the following available from the platoon:
- Pat Sgt Scott
- Cpl Wilson and Cpl Smith
- 11 other ranks.
A further 6 men will return with Cpl Brown and Lt Stuart after the next game.
Opinion
- CO's opinion: Reduced -3 to -5. -1 support point next battle.
- Own opinion: Remains at Worried.
- Men's opinion: Reduced -2 to -4. -1 to Force Morale dice roll next battle.
Lessons learned
Coming within 4" of a JOP only closes it while you remain within 4". To prevent the enemy from using it you have to remain within 4" or move onto it. This locks it until recaptured by enemy or removed by an end of turn.
I knew this of course, so the real lesson is to not believe that you have won when you have almost won and to not get so excited by success that you fail to prevent failure.
Germans
Losses
Six casualties total. Three are recovered since the Germans hold the field and have three points of Force Morale more than the British. The remaining three casualties are split between 1 KIA and 2 WIA who will miss out on the next battle.
Opinion
- CO's opinion: Improved +1 to +3. +1 support point next battle.
- Own opinion: Remains at Assured. +1 to Force Morale dice roll next battle.
- Men's opinion: Improved +2 to +5. +1 to Force Morale dice roll next battle.


Ouch, men nästan. Spännande storming iaf!
ReplyDeleteJa, sååå nära...
Delete