Encounter at le Valtru, 08:00
This is the second battle in our playing of the Scottish Corridor campaign.
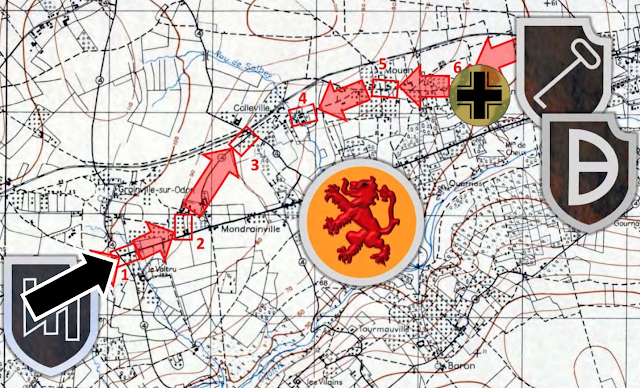
Kampfgruppe Weidinger attacks from the west with a panzer grenadier platoon commanded by Obersturmführer Heinrich von Blomberg. He is supported by a Panther tank, a flamethrower team, another Senior Leader and an adjutant, for a total of 16 support points.
The British platoon is supported by a carrier platoon of 3 carriers (with one of them automatically upgraded from a JL to SL and commander of the carrier platoon), a 6pdr anti-tank gun and an extra PIAT.
Patrol Phase
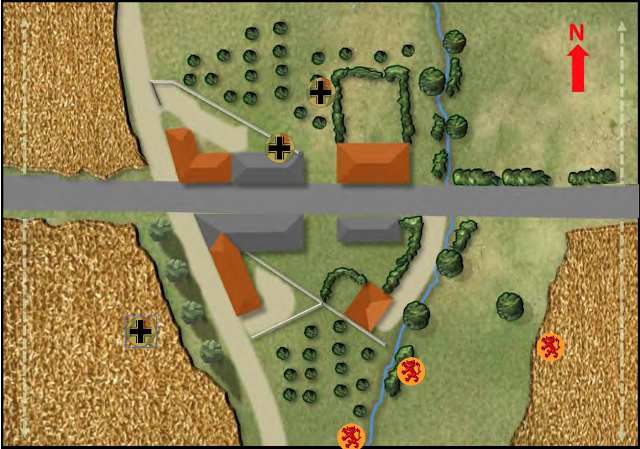
The British deploy on their left flank with 2 Jump Off Points far forward, almost across the centre line towards the German table edge. The Germans deploy over a broad front, ready to strike both left and right.
Battle
The British start at Force Morale 10 and the Germans at 11.
The British start by deploying a squad in the orchard on their left flank. The Germans deploy a squad opposite them in the wheat field.
From the road and heading towards their right flank, a British carrier appears. It is soon followed by two more, one of them commanded by a Senior Leader. Over a few turns both the British infantry in the orchard and the Germans opposite them in the field carefully inch forward while the carrier platoon races up the British right flank and starts crossing the shallow river while the Germans lay low and builds up to their first Chain of Command Dice.
When the first carrier reaches the hedge-lined backyard of the large residential building by the river crossing, the Germans ambush them with a flamethrower team but only scores 3 hits with 12 dice… they pin the team inside but fails to drive off or disable the carrier.
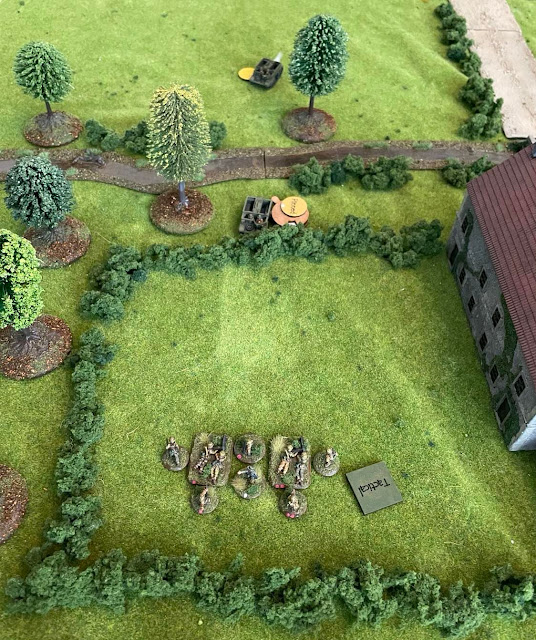
The Germans deploy a squad and a Senior Leader in the shape of Obersturmführer von Blomberg in the backyard, ready to rush the newly scorched carrier with grenades.
The other two carriers move closer, with the Senior Leader’s carrier going on overwatch.
Von Blomberg gives two of his men a hand grenade each and and tells them to nail the carrier on the other side of the hedge. Being careful to keep their target carrier between themselves and the Senior Leader carrier on overwatch, they make it safely to the hedge and toss their grenades. Both grenades hit but only score One Net Hit, making the carrier reverse from the hedge and take one shock.
The carrier platoon shoots up the two grenadiers behind the hedge killing one and making the survivor break for safety.
Growing desperate for a chance to stop the carriers and inflict some damage on the British morale the rest go the Germans in the backyard advance up to the hedge throws 3 more hand grenades at another of the carriers. 2 grenades hit, but fail to cause any casualties!! (Some saboteurs at the munitions factory had obviously done a good job…)
A panzerfaust is fired at the Senor Leader carrier but misses.
Predictably the carrier platoon retaliates and shoots up the squad who take some casualties before retreating further back into the backyard, throwing smoke to screen themselves from further punishment.
The carriers smell blood and advance to the hedge, continuing to pour fire at the Germans behind the smoke screen, wounding von Blomberg.
The German flamethrower team reappears in the backyard and hoses the Senior Leader carrier. The Senior Leader is killed and his team breaks and takes off in their carrier. (there was some discussion here as to wether the crew takes of on foot or drives off, we didn’t find the rules crystal clear and decided to go for the later alternative, please feel free to leave a comment on how You interpret the rules)
Meanwhile on the Germans right flank, the British have deployed another squad and a Senior Leader. The concentration of British infantry moves ominously towards the German squad by the JOP in the wheat field.
A Panther tank enters the table and quickly speeds past both the Germans in the wheat field and the closest British, heading for the closest British JOP.
The British deploy a PIAT team in the Panther’s flank, but despite point blank range it fails to hit.
Another PIAT immediately deploys next to the first one. They roll two 6:s and cheers can be heard all along the British lines. The joy is however short lived as the PIAT rolls mostly 1,2 and 3:s while the Panther a bunch of 5 a 6:s, making the hit glance off harmlessly.
The Panther rumbles on, parking itself on top of the closest British JOP. The German squad in the wheat field charges the two PIAT teams in the open and destroys them without taking any casualties.
To protect the German squad exposed in the open from the now very close British squads in the orchard the Germans deploy another squad on overwatch in the wheat field.
The British decide to brave the overwatch fire and charges the exposed German squad with two squads and a Senior Leader in an attempt to avenge their brave PIAT-wielding friends. Light Cover from the orchard save the British from the worst of the overwatch fire. A hand grenade from the charging British lands close to the German squad leader, knocking him out.
The German squad is wiped out and the unconscious Junior leader taken prisoner, but the British take quite a few casualties themselves. German Force Morale falls to 3 while the British are still at 6.
The German squad that has been on overwatch is joined by a Senior Leader and pours more fire on the British in the orchard, pinning both British squads and wounding a junior Leader, taking British morale to 5. The British try to make the best of their Command Dice, but it’s obvious that they won’t be able to clear shock at a higher pace than the Germans is inflicting more new shock if this drags out into a shooting match.
With three Command Dice the Germans are unable to do much but get another Chain of Command Dice. With it they end the turn, capturing the British JOP under the Panther. The British in turn use a Chain Of Command Dice to escape a Bad Thing-roll for losing the JOP.
The British now think long and hard about wether to withdraw or keep fighting. The Germans are weakened with just three Command Dice to roll and on the verge of breaking, but the British just have one carrier in position to affect the right flank and on their left two pinned squads with a Panther and a German squad with Senior Leader ready to shower them with more machine-gun fire…
After some deliberation the British decide to carry on and roll their Command Dice. A rather poor roll leaves them with 3, 1, 1. They decide to activate the Junior Leader in the carrier. Through the smoke in the backyard he skillfully picks out his targets rolling four 5 and 6:s on six dice with his Bren. Von Blomberg is wounded again, pushing German Force Morale to 1. The British remove the German JOP in the wheat field.
(At this point the Germans should have withdrawn since their force morale below 3 prevented them from winning this scenario, but after several hours with some of the most intense gaming any of us hade ever experienced, strategy was long forgotten and tactical victory the only thing that mattered)
The Germans roll 2 Command Dice, hoping to roll at least one 3 or 4 to deliver a potentially game-winning blow to the British infantry in the orchard. They roll 5 and 6, gaining an unusually unwanted Chain of Command dice.
Next phase the British carrier opens up again, killing von Blomberg and one of the teams with him. Not even the unwanted chain of command dice can save the Germans as their morale crashes to 0 and they rout.
Conclusion
The Germans
A very hard earned British victory after some extremely tense gaming. For the Germans the CO:s opinion drops from 0 to -1 and the men’s opinion falls to -3. Their leader changer mood from happy to content.
The platoon has taken a heavy beating with the platoon commander von Blomberg killed, one Junior Leader captured and 7 men KIA. They will most likely not make another appearance as a platoon but be used as replacements to fill up the other platoons.
Weidinger will have to do some serious thinking and decide wether he wants to risk bogging down in Le Valtru or use the option to bypass the village, leaving this decimated platoon and another one behind but gain some momentum.


Comments
Post a Comment