Attack into Mouen, 09:00. "A hedge to far?"
This is the third battle in our playing of the Scottish Corridor campaign.
Kampfgruppe Frey attacks with a fresh platoon led by Obersturmführer Ostendorf. They are supported by a Tiger tank, an infantry gun and an adjutant for a total of 15 support points. The German plan is to press forward with the Tiger, and potentially start rolling over and taking the British Jump Off Points one by one. Meanwhile, the grenadiers will advance on the left flank, using the hedge lines as fire bases. If the British infantry decides to engage in a fire fight the leiG.18 can be brought up to tip the scale in favour of the germans.
The British have an extra rifle section and an extra PIAT in support. The odds are not in their favour, and the Tiger is basically invulnerable, so the plan is to try an aggressive move vs the Jump Off Points and if that does not work try and cause maximum casualties.

The Germans keep pushing on the eastern flank.
Patrol Phase
The British deploy their JOPs roughly in a triangle with two up front and one further back for a classic defence in depth. The germans deploy on a broad front with two JOPs along one of the hedges and another behind a tree in the walled courtyard on their right flank.
Both the British and the germans start the battle with Force Morale 8.
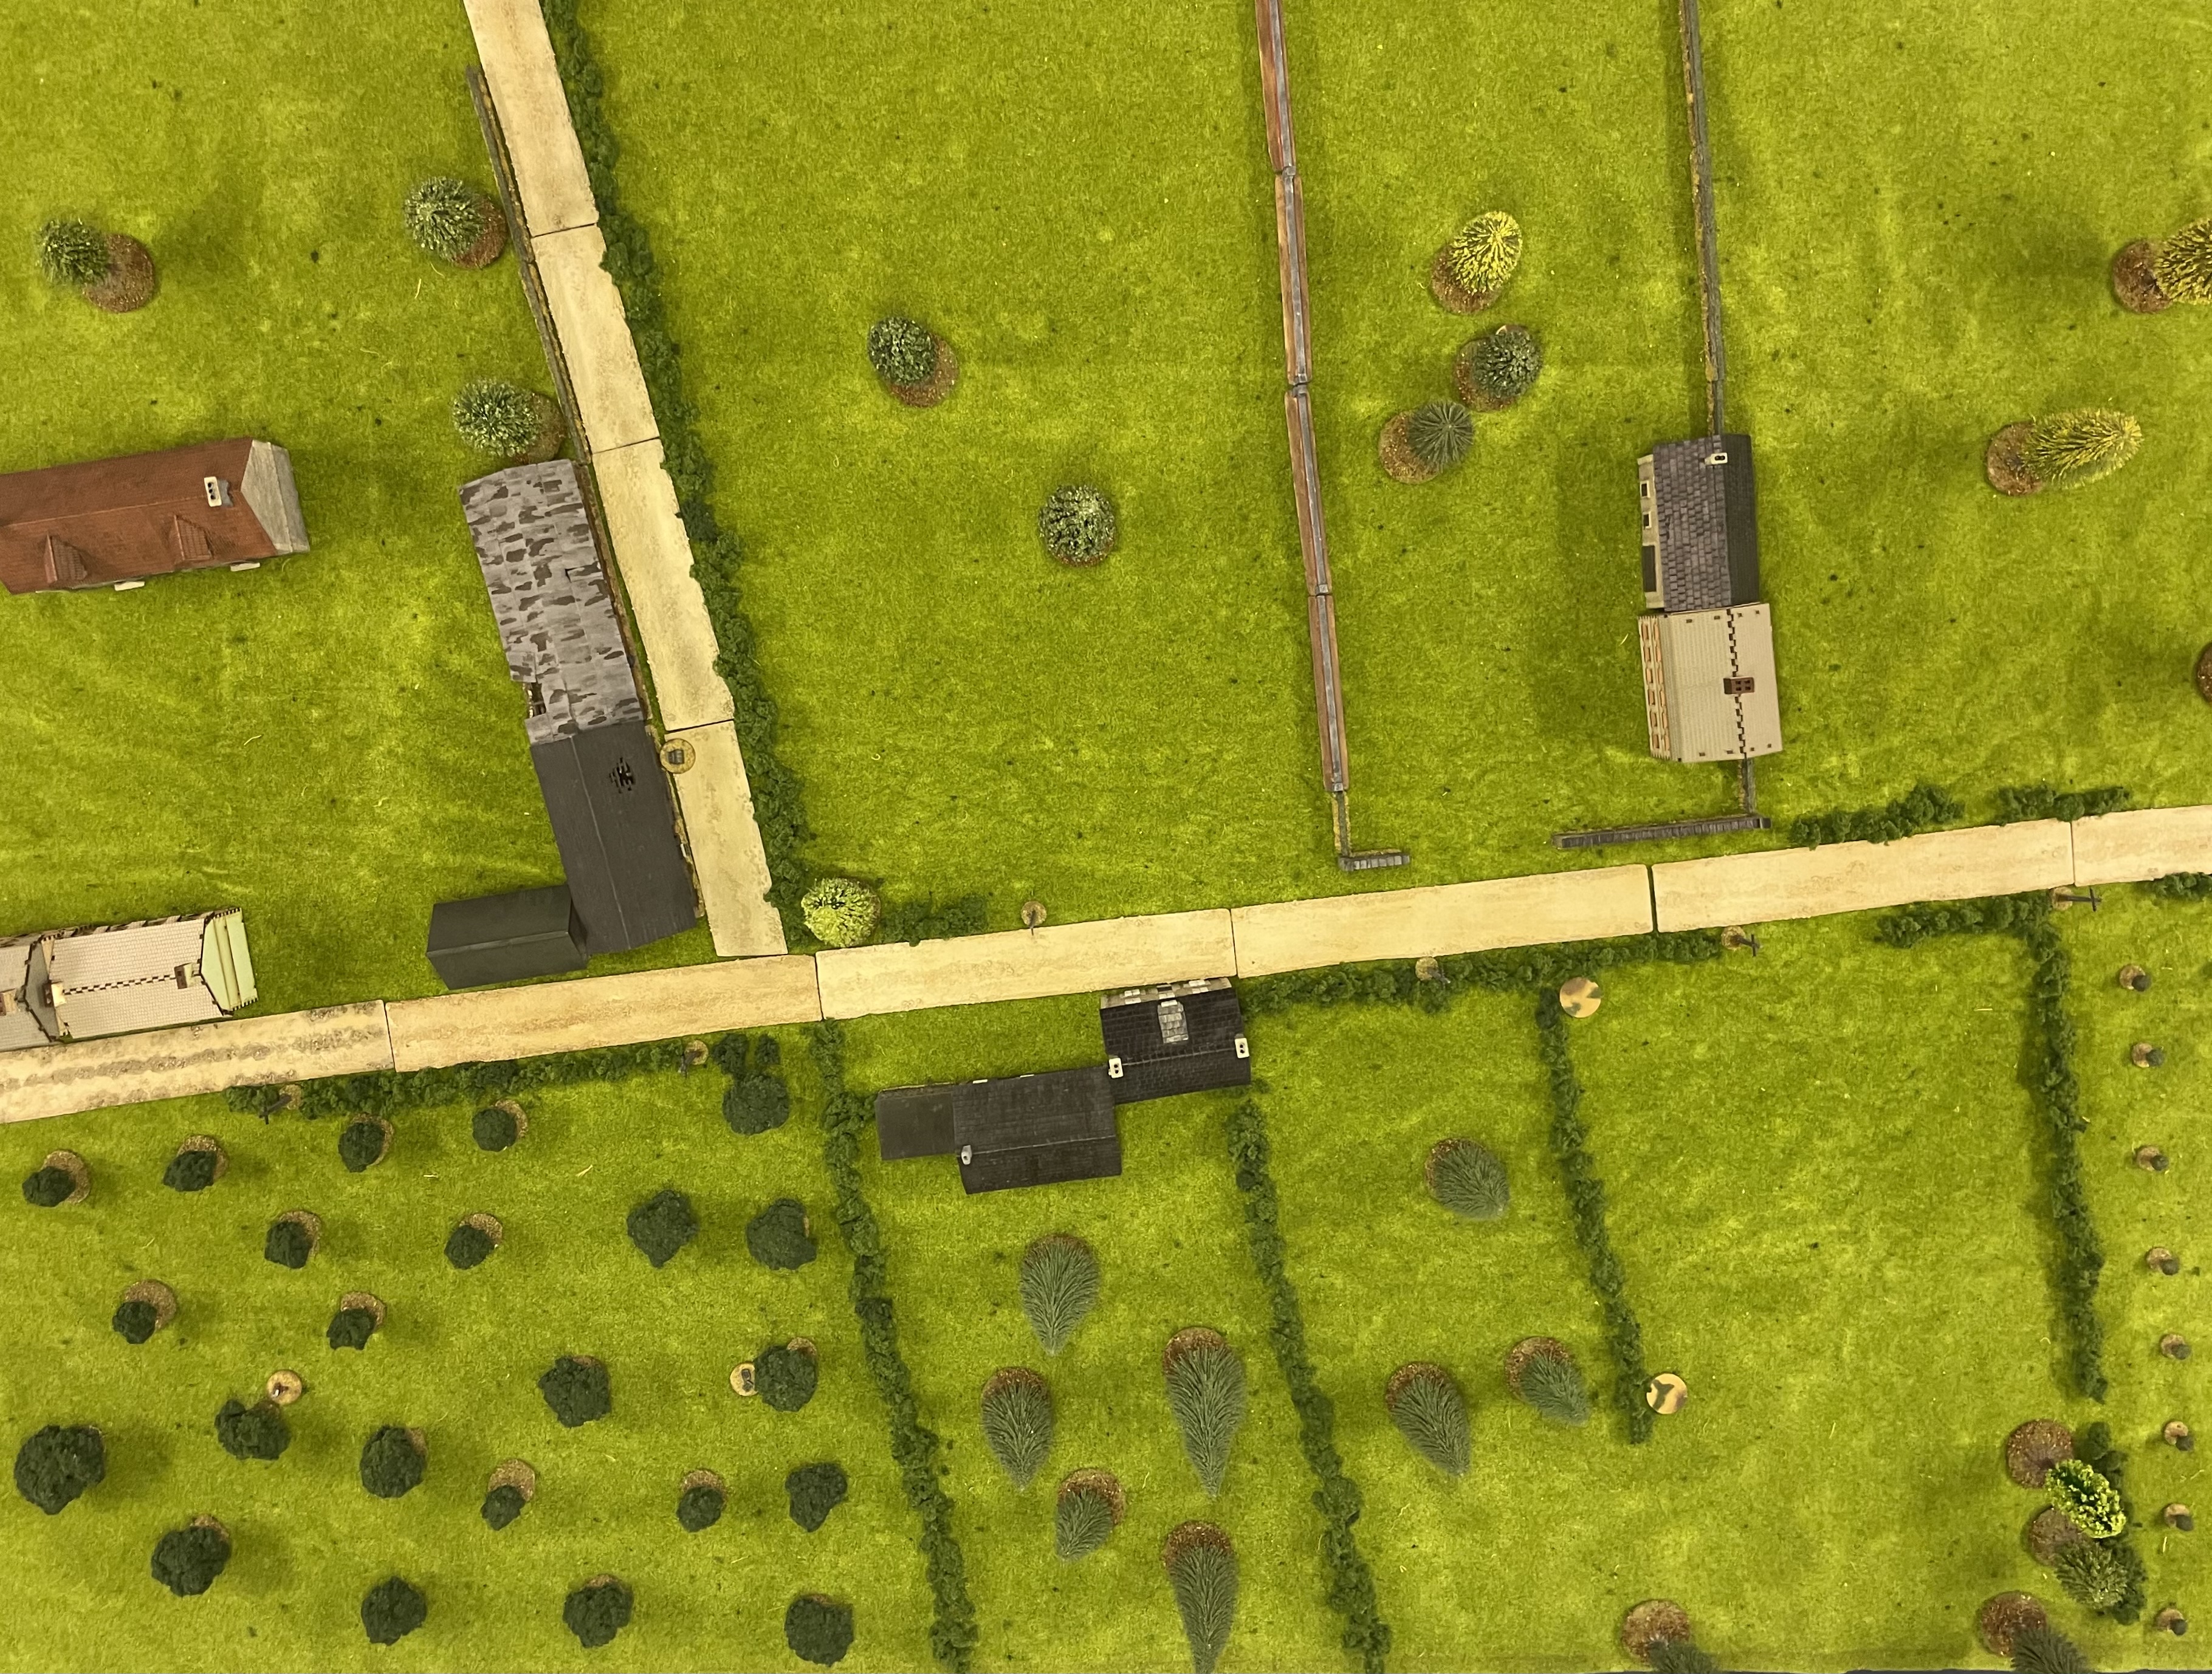
Jump Off Points on the table.

JOPs on the map
Battle
A mighty Tiger entering the road signals the beginning of the battle. The British are not going to sit patiently and wait for the Tiger to roll over them. They aggressively deploy two squads and a Senior Leader on the far side of a hedge, ready to threaten the two closest German JOPs, just two hedges away.
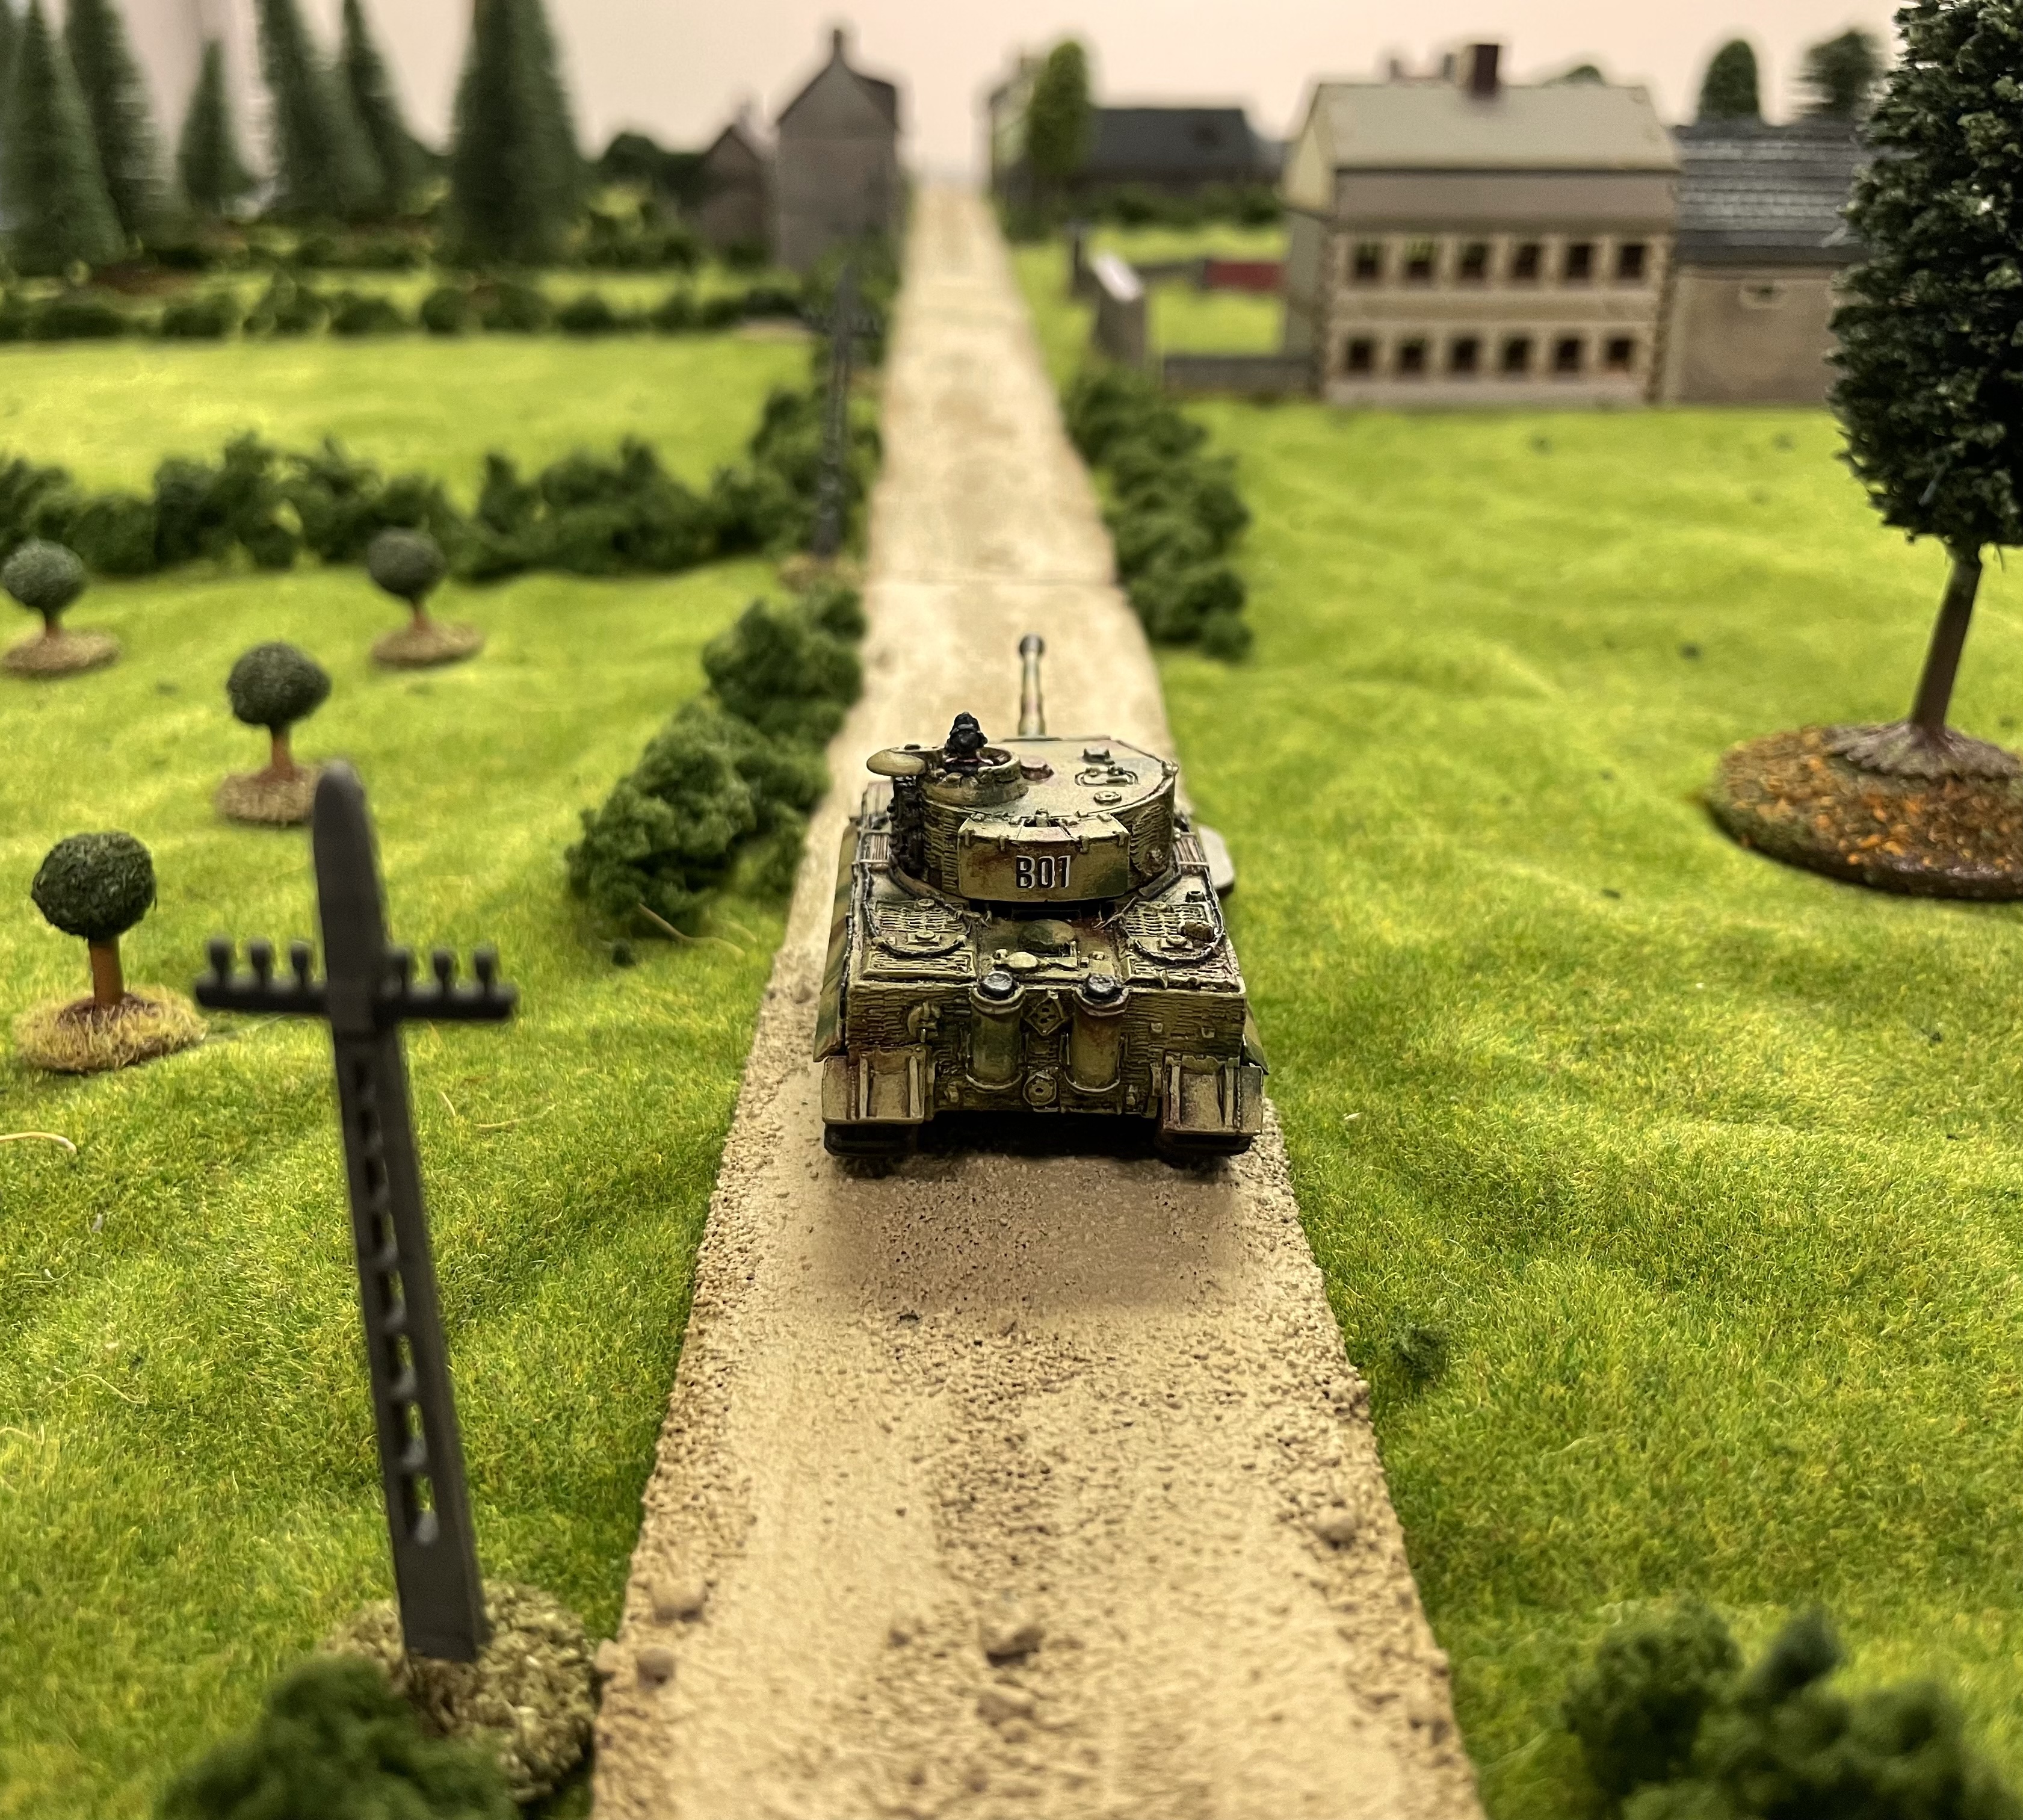
Approaching Mouen

British deployment

The German infantry hesitates, not sure what to think of the British intentions, and decides to not deploy just yet… Meanwhile, the Tiger rumbles on along the road at a slow but steady pace.
The British infantry starts to advance towards the next hedge, careful not to get too close to it and be seen from the next hedge where the German JOPs are positioned or from the road where the Tiger is scanning for targets.


The brave Scots prepare themselves to go over the top (or hedge) yet again…
The germans realize that the game of waiting out the British is starting to get dangerous. A British double phase and some lucky dice rolls could spell catastrophe for the germans with two JOPs potentially lost. They deploy a squad in tactical stance behind the hedge, ready to stem what looks like a soon to come charge at line formation resembling something from the last war…
With some grenadiers to guard the JOPs, the Tiger continues forward towards the British JOPs.


Making the most of concealment from the hedge, the germans scan the field and hedge in front of them for signs of the enemy. So far, all they hear is the Tiger moving away from them on the road to their right…
From their position along the hedge, the germans start seeing signs of movement behind the next hedge as the British crawl into fire positions. Realizing that this is their chance to a firefight they feel confident to win, the germans end the turn with a Chain Of Command Dice.

Having removed the British tactical stance the germans look forward to deploying en mass and shooting the British to oblivion, but a rather poor roll of the Command Dice (and the German player forgetting that he could have deployed the leiG.18 on a 1) sees the germans deploy ”only” another squad and Senior Leader. The two squads open upp on the British in Light Cover behind the hedge, causing some casualties among the men and quite a bit of shock, but not hitting any leaders.
The British decides to try their luck and continue the shootout with the germans. While this may in most situations not have been recommended, in this case it makes a lot of sense. Since the British have no shortage of men and gets a new platoon each game but the germans don’t and don’t get any reinforcements, making the germans take casualties can have a great impact on the campaign further on. Besides, more than once have the odd leader sticking his head up too far or a freak dice roll of mostly 5 and 6 (or 1 and 2) changed the course of a fire fight in an unexpected direction…
The British fire is however at most average and causes a few casualties but no leaders are wounded. Each German team also takes a point of shock.

The germans now deploy their ace up the sleeve in the shape of an infantry gun. It opens up together with the machine-guns of the two squads, further decimating the British line.


With casualties mounting and faced by a massive amount of firepower the British commander decides to withdraw before the impact on the men's morale becomes too serious.
Conclusion
Another victory for Kampfgruppe Frey, and one step closer to closing the Scottish corridor and linking up with Kampfgruppe Weidinger. All the German platoons casualties will return to the platoon immediately or before their next battle, so no permanent losses. The CO’s opinion goes from +1 to +2 and the men’s opinion goes from -2 to 0. The commanders mood changes from cheerful to merry.
The British are not too satisfied. The CO's opinon decreases from -1 to -2, the men's to zero and the commanders own mood changes to worried. Hopefully they will be better at keeping Weidinger at bay next battle...


Comments
Post a Comment