4th Probe into Fontenay, June 25th, 16:00
Lt Stuart tucks away his Webley, safely back at battalion CP. He learns that Sgt Scott has already brought the platoon forward again for another attack into Fontenay, this time reinforced with 11 new riflemen.
”Thank God he made it back to safety” was Lt Stuart’s first words upon hearing the news. ”I can not say I’m surprised about him immediately organising a fresh attack. I would trust that man with my life, and more importantly, with the lives of my men. May he have more success than I had.”
The British plan

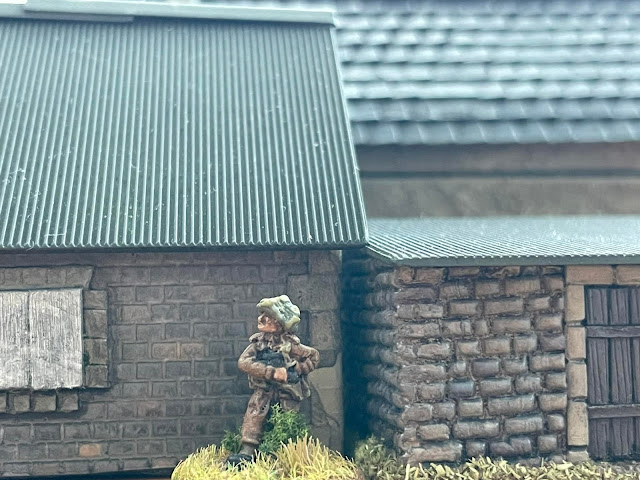
Plt Sgt Scott and his men advance past an abandoned barn while moving up towards Fontenay.
"Ok, men. We're having another go. This time we'll flank Jerry on the right. Advance through the cover of the hedges and high walls up to where the trenches are. If they are empty we occupy them as the AVRE rolls up. If there are Germans in them we shower them with hand grenades (and AVRE support) and then assault. Then we move forward, penetrating the German lines. Any questions?"

Cpl Smith leading a patrol
This is the fourth battle in our Operation Martlet campaign, and also the fourth British attempt at probing Fortenay. The British are seriously behind schedule and the Germans have taken almost no casualties. If the British fail again the entire campaign threatens to fall apart.
Forces
British platoon
Platoon Sergeant Scott has informed the Battalion commander about the situation. It was decided that the platoon needed strengthening so replacements numbering 11 men (I rolled a lucky 6) where added to the platoon. Plt Sgt Scott reorganized the troops and prepared for a fourth, and hopefully final, assault on Fontenay.The British platoon looks as follows at the start of the battle:
- Plt Sgt Scott
- Lt Mortar
- Piat
- Section 2, Cpl Brown, full strength
- Section 3, Cpl Smith, full strength
- Lt Stuart - dispersed
- Cpl Brown - dispersed
- 4 men dispersed
- 2 men lightly wounded
Opinion
- CO's Opinion: -5. -1 to Support points
- Own Opinion: Worried
- Men's Opinion: -4. -1 to Force Morale roll.
British Support (15 points)
- AVRE (7)
- Extra rifle section (4)
- PIAT (2)
- Adjutant (1)
- Medic (1)
The German platoon
The German platoon starts at almost Full strength, with 1 man killed and 2 men missing out due to injuries. The Germans choose to have the 3rd squad reduced to only one team i.e. JL and a 3 man LMG team.- Obersharfürer Weiss
- Unterscharführer Frey, two 3 man MG42 team Leader, 2 Panzerfausts
- Scharführer Raus, two 3 man MG42 team Leader, 2 Panzerfausts
- Scharführer Wegner, one 3 man MG42 team Leader, 2 Panzerfausts
- Scharführer Zeitzler, Panzer IV H
Opinion
- Commander's opinion: +3. +1 Support point.
- Own opinion: Assured. +1 to Force Morale roll
- Men's opinion: +5. +1 to Force Morale roll.
German support (7 points)
- Extra Senior Leader (2)
- Adjudant (1)
- Sdkfz Halftrack (2)
- Two extra panzerfausts (2)
Patrol Phase & Jump Off Points
The Germans deployed their patrols in a narrow line on their left flank. The British moved up by the hedgerows on their right, aiming to get a Jump Off point by the fortified house.In the end the British could only place two JOPs but where satisfied with their placement and with denying the German's easy access to the trenches.
The Germans got a good defensive spread with depth, but where not able to safely deploy in the trenches. It might not have been an attractive option anyway, since any troops there would likely have been bombarded by grenades from British troops on the other side of the wall.

2 British and 3 German JOPs. German patrol markers already removed, the 3 green discs by the house are the British ones. The tank in the middle of the field is the abandoned AVRE from last game. The four black lines are the german trenches.
The Battle
The British start the battle with Force Morale 8, the Germans with Force Morale 9. Kind of lucky for the British considering the modifiers (+2 for the Germans and -1 for the British).Early game

The British arrive in good order.

The 1. and 2. section leg it towards the wall, and the German trenches.
At the same time the AVRE arrives and rumbles forward slowly. The AVRE crew gaze cautiously at the abandoned wreck from their last attempt.

The big green beast is back. Or at least it's sister...
The steel beast took a lot of punishment and the crew managed to bail out unscathed last time so they are reasonably confident. Just watch out for any panzers and AT guns and don't get within panzerfaust range if possible.
Sgt Scott orders the two sections to run towards the wall and take position while the third sections and the PIAT arrives.

The British prepare to go "Over the top".
The grenadiers prepare a warm welcome should the British jump the wall.

Come on, Tommy. Jump that wall!
The Germans spend a CoC dice to end the turn (ending the preliminary bombardment) and the Panzer arrives (without line of sight to the AVRE).

Panzer on the prowl

View from above including AVsRE both old an new
Mid game
The British light mortar and medic arrive as well.
The AVRE moves up beside the KO'd sibling, hoping the Panzer's gunner will confuse the two.

Meep meep, wroom! Or something...
The Germans prepare an even warmer welcome, deploying a second squad and Obersharfürer Weiss. Should the British jump the wall now they will be cut down mercilessly.

That's a lot of firepower...
Fortunately for the British, the AVRE rolls swiftly forward to support the infantry (or is it to avoid the Panzer?).

Hold on, I'm coming!
The Germans decide to fall back into the orchard, but get interrupted by the AVRE's flying dustbin (British use a CoC dice), knocking out one team and injuring the junior leader. German FM down to 8.

8 hits in the open. 3 dead, one leader injured. The Germans then manage to get well within the orchard.

Sgt Scott: "Over the top boys, to the green fields beyond!"
Cpl Smith: "So we're skipping the mud and the blood, then? Fine by me."
Cpl Smith: "So we're skipping the mud and the blood, then? Fine by me."
Then the PIAT, Sgt Scott and the 3rd section follow, while the first two sections leg it forward, one to the trenches and one towards the house and wall. The AVRE goes on ominious overwatch...

The British move up in force while the Germans take up positions to punish them if they move round the corner of the house (there is a gap in the hedge where they can fire out). Will the British press on regardless, or will they seek a different route?
The Germans, having moved tactically into position in the orchard, eventually go on overwatch.

Germans about to go on overwatch.
Late game
The Hanomag arrives carrying the third German squad (just a team really) and the extra senior leader. It moves up the road as far as possible without exposing itself, keeping behind the hedge.The Panzer IV moves out of cover to shoot at the AVRE. It hits, causing the AVRE to fall back, somewhat worried. Will it press forward to engage the infantry in the orchard, or turn to protect the flank?
The British light mortar fires smoke directed by the troops on the other side of the wall. With some luck the smoke is spot on the Panzer IV.
The British light mortar fires smoke directed by the troops on the other side of the wall. With some luck the smoke is spot on the Panzer IV.
One British section occupies the forward trench and goes on overwatch to protect the flank. The other sections consider doing a "flanking" move to bypass the germans in the orchard by going to the left (I.e. the courtyard and then towards the road).
The Hanomag speeds toward the abandoned AVRE to use it as cover, apparently looking to flank and envelop the British forces, and seize the Jump Off points. An aggressive move, definitely...
The Hanomag speeds toward the abandoned AVRE to use it as cover, apparently looking to flank and envelop the British forces, and seize the Jump Off points. An aggressive move, definitely...
The Panzer IV moves out of the smoke, fires at the AVRE and misses!
A second PIAT appears in a 2nd story window and fires at the Hanomag, missing its mark. Will the Hanomag team manage to engage the British from the rear, taking their Jump Off Points and cutting of communications with HQ and any chance of an organised retreat?

"Don't miss, don't miss....
Bugger, I missed... "
Bugger, I missed... "
The AVRE, like a good mother hen protecting its chicks, turns to the left to bring its gun to bear on the Panzer IV... Both sides hold their breath and stare wide-eyed at the spectacle (at least those with line of sight). BOOM! It's a hit - spot on! The Panzer goes up in flames, a catastrophic explosion killing the crew including Scharführer Zeitzler!

BOOM!
(the smoke on the right is the smoke bombardment from the light mortar)

10 AP dice from the AVRE - 6 successes
6 armour dice from the Pz IV - 1 success
The remaining PIAT now has a medium range shot at the speeding Hanomag.

"Please, let it be a hit..."
It's a hit! 7 AP dice to the side of an AFV with 2 armour dice won't end well...

They almost made it into cover behind the AVRE wreck...

The skilled grenadiers bail out without problems, not even the driver gets a scratch.
Germans withdraw
The German Force Morale falls to 3 after losing the Panzer, having the panzer leader killed and the halftrack knocked out. They do not see any way the situation can be improved and withdraw, content in at least delaying the British for almost a day which is more than anyone expected.
Post Battle
British
Zero casualties, objective seized. Sgt Scott's first outing as platoon leader could not have gone better.
With Lt Stuart and the missing men from Cpl Browns squad returning the platoon will be almost back to full strength (just 3 men short) for the next battle. One might wonder if the men are happy to be back under the Lieutenant's command or if they perhaps wouldn't have minded if Sgt Scott had kept command... Well, it is up to Lt Stuart to regain their (and his CO's) confidence!
Perhaps just as significant as the above is the destruction of the German Panzer. This is a significant blow to the enemy. Still, we are well behind the time table, and need every break we can get.
Opinion
- CO's Opinion: Improved from -5 to -4. Still -1 to Force Support.
- Own Opinion: Improved from Worried to Guarded.
- Men's Opinion: Improved from -4 to -2. No longer any minus to Force Morale.
Lessons learned
Cover is good. Cover that blocks line of sight is even better. Make a plan, stick to it, but be prepared to improvise.
Germans
Losses
One section i.e. three men where casualties. One permanent, two miss the next battle. So next battle the Germans are down 4 men. And one Panzer IV...
Opinion
- CO's Opinion: Reduced from +3 to +2. No modification to Support points.
- Own Opinion: Merry. No longer +1 Force Morale.
- Men's Opinion: Reduced from +5 to +2. Ouch. No longer +1 Force Morale.


Comments
Post a Comment